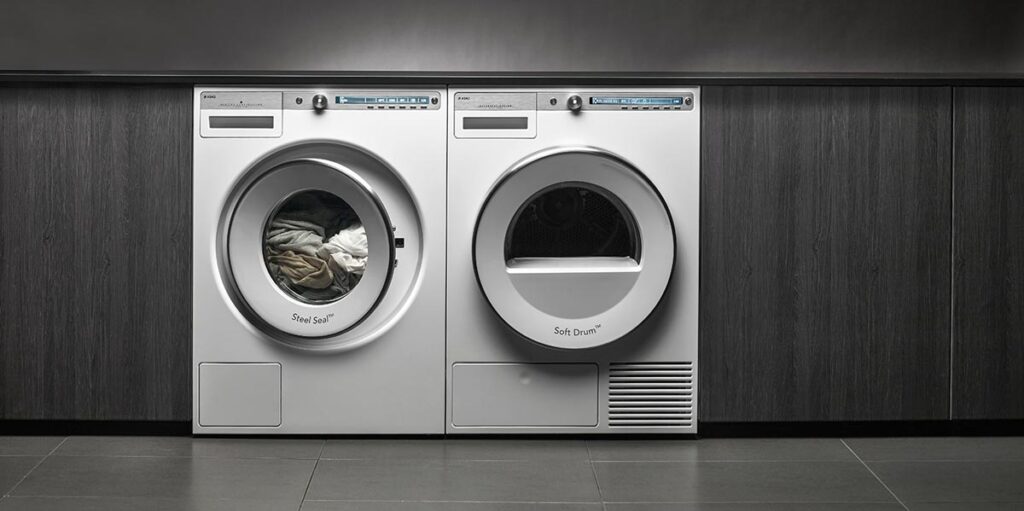
How to repair washing machine
Failure of the washing machine is a real tragedy for the housewife. Manual laundry is gradually becoming a relic of the past, and you do not want to return to it because of malfunctioning equipment. There is not always the time and desire to wait for the repair of the master, in half of cases the repair of the washing machine is under force even to the novice home handyman.
We will tell you how to carry out a simple repair of the washer with your own hands. In the article presented by us, typical variants of violations in the work of household equipment are given, the methods of restoring its performance are described in detail. Taking into account our tips, you will correct the situation without any problems.
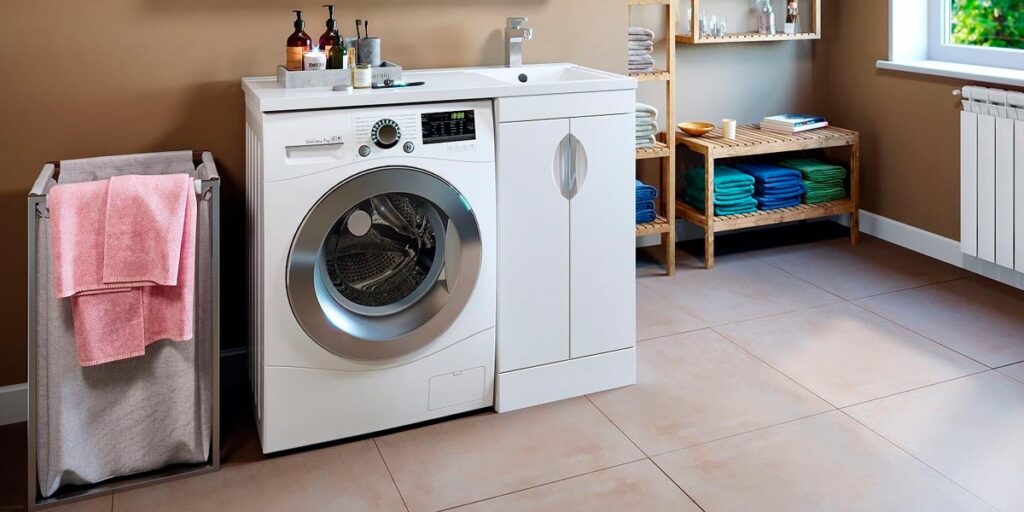
Design and operation of an automatic machine
To decide to repair the washing machine with your own hands, you must first have a good idea of its structure and principle of operation.
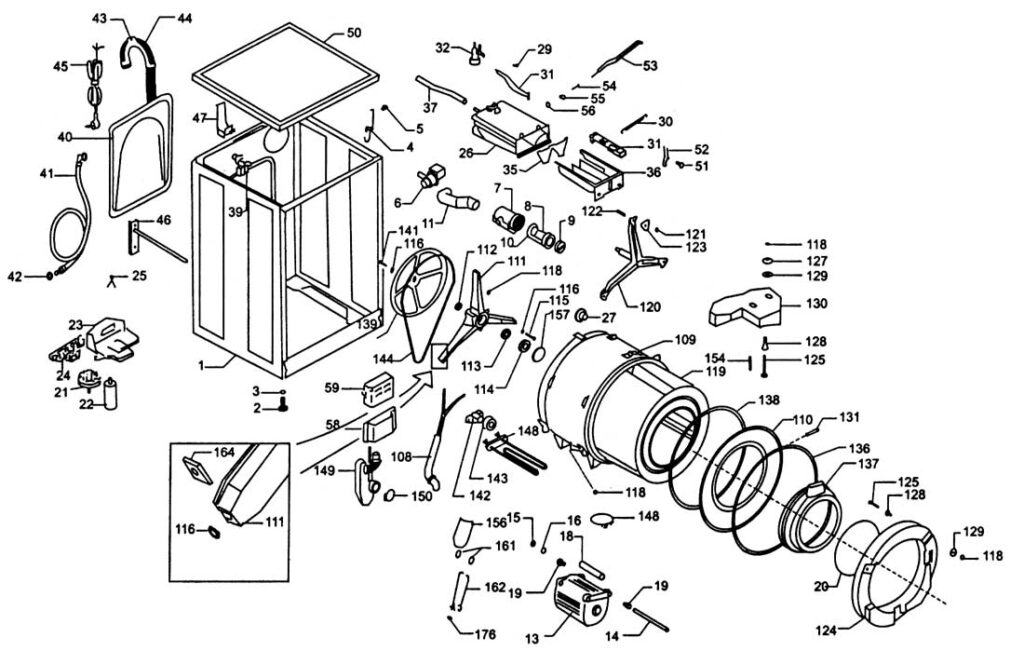
The main parts of the machine are:
- motor;
- electric heater;
- drain pump;
- water tank and laundry drum;
- electronics (control panel);
- water intake valve;
- housing.
After selecting a program and starting it, the first washing cycle begins. It includes drawing water and heating it. The water can be heated to a certain temperature, which is controlled by a sensor and timer. The detergents are added.
The water is drawn through a valve. When a signal is received that there is enough water, the valve closes. Depending on the selected mode, there are several cycles of water intake-drain. After the last rinse, the spinning starts. Here the drum rotates at full power.
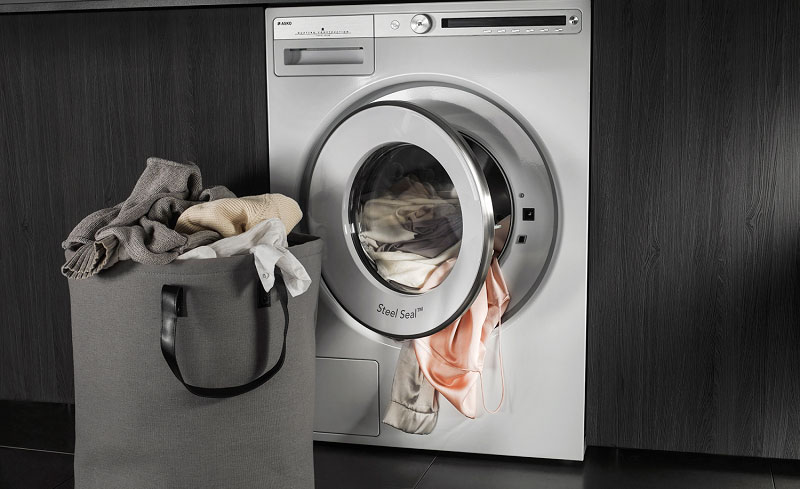
The enclosure includes not only the walls of the washing machine, but also the hatch. The round door on the front wall allows you to observe the movement of the laundry in the drum and has a protection against being switched on if it is not closed tightly.
The door does not open immediately after turning off. This protection is based on a bimetallic sensor. The latch only opens after the sensor has cooled down.
Top common malfunction symptoms
A non-professional can’t immediately determine what has gone wrong. But there are signs that may indicate the cause of the malfunction. The listed most common symptoms and possible causes of failure will help with diagnosis.
No. 1: the water in the drum is not heated
Often this failure is not detected immediately. Most machines behave as if nothing had happened: they start washing, rinsing, spinning. You take the laundry out of the drum and do not even suspect that all the processes took place in cold water.
If you encounter such a problem, conduct an experiment: during the active mode of the washing machine at high temperature, gently touch the glass of the drum door. It should be heated by the hot water. If it did not happen, most likely the water in the system is not heated.
There may be several reasons for this:
- Failure of the heating element;
- Failure of the thermostat;
- Failure of electronics – programmer.
Of course, there is also the option of choosing the wrong mode, when washing in cold water is provided by the program. Before sounding the alarm, read the manual and make sure that the mode is selected correctly.
A burned out heating element is a common story in the workshop. With such a breakdown people apply very often. Because of a power surge, short circuit or factory defect, the heating element can burn out. The average lifespan of a heater is about 5 years.
If the temperature sensor is broken, the machine behaves differently. The heating element is working and ready to heat water, the programmer sets the desired temperature, but the regulator – the temperature sensor – gives a false signal that the water is already hot. Thus, the machine washes in cold water. Most often it has to be replaced.
If the problem is software (lost firmware or damaged circuit board), the washing machine simply gives the wrong command and the water does not heat. After updating, the washing is started again and if the problem is not eliminated, the programmer is replaced.
No. 2: The washing machine bangs and vibrates
Some washers knock from the first wash. This may be a feature of the design of the appliance. It is often found in older models, when the washer was like a rocket during the spin cycle. Modern washing machines are quiet.
A knock can be a sign of:
- improper installation;
- foreign object between the drum and the tank;
- bearing failure;
- failure of shock absorbers;
- uneven distribution of laundry.
The first thing you should pay attention to is the installation of the washer. It is improper installation that causes the occurrence of knocking during washing in most cases.
The machine must be aligned with the floor and stand firmly on it. There are special feet for adjustment, which allow you to adjust the height of each of the support points separately.
When you don’t take out loose change, nails and paper clips from your pockets before you send your laundry to the wash, you risk breaking the washer. The fact is, small things can easily get into the water heating tank through the gap between the tank and the drum.
Bearings ensure that there is no friction during drum movement. They also have a lifespan and most often they fail before other parts. It is easy to know that it is the bearings: in addition to the knocking, the washing machine will make a creaking noise. If you hear such sounds – get ready to replace the bearings.
Shock absorbers dampen the vibrations of the drum during rotation. If one of them breaks, it will immediately affect the operation of the washer. The drum may visually shift, tilt.
The cause of the knocking, which is not a malfunction, can occur when the laundry in the drum is not evenly distributed, that is, it is collected on one side. This often happens during the washing of bed linen in older models of machines. We cannot call it a failure, but rather a peculiarity of work, which may be the cause of the knocking.
No. 3: water dripping from the manhole or leaking underneath
If you notice a puddle under your washer, do not rush to grab your head and buy a new appliance.
The most common cause of water coming out of the washing machine is:
- Failure of the gasket on the inlet hose;
- Manhole cuff breakage;
- Breakage of a spigot.
These structural elements are not expensive and can be replaced fairly quickly with experience and knowledge in this area. Any depressurization of the joints, of course, leads to leaks. The task of the repairman is to find the source of the leak and eliminate it.
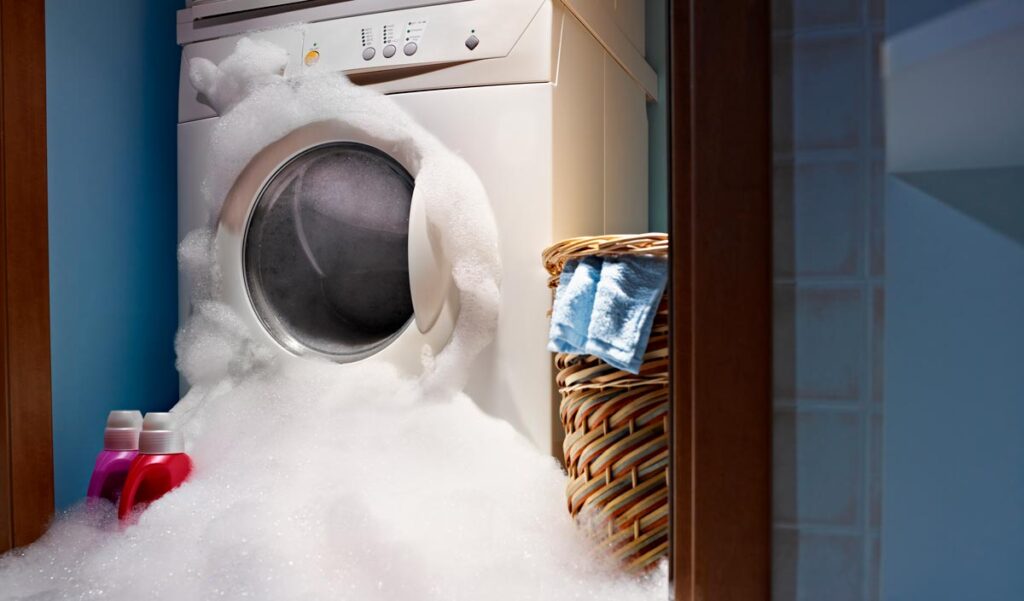
Over-abundance of foam in the drum leads to the fact that it begins to seep through all the smallest crevices and minimal technological holes. The result is a puddle on the floor. If the machine does not leak when washing other things, then it can be attributed to the peculiarity of design and add less detergent for washing curtains.
No. 4: water in the drum before or after the washing
If you open the drum after a full wash cycle and see water there, your machine has a drain problem. During the spin cycle, all the water that can be squeezed out of the laundry must go down the drain.
If this does not happen, you need to look for the cause of the failure. The most common causes are:
- A clogged filter;
- A broken pump.
Remember the last time you cleaned your washing machine’s filter. If you don’t know where it is, you probably already know the cause. A clogged filter can not only cause inconvenience in the form of water in the drum, but also become the cause of a more serious failure – the drain pump.
Another problem: water in the drum before you turn it on. That is, you are going to do laundry, open the door, and there everything is poured. Assess the quality of this water: it is clean or dirty.
Clean indicates a broken valve in the area where the machine is connected to the water supply. Dirty comes from the sewer. Most likely, the siphon is clogged and the water after washing simply has nowhere to go.
No. 5: washing does not start – no water
The opposite problem – no water. That is, you turn on the washing machine as usual, start the washing cycle, but the washing does not start and an error appears about the lack of water in the system.
If you have checked the water supply and opened the faucet, look for the problem elsewhere:
- The supply hose is clogged;
- The inlet filter is broken;
- Program failure of the water supply.
To diagnose the problem, disassemble the appliance, wash each element in the water supply system, reinstall it and try to run the wash. If the water does not come in, you will have to make repairs or replace it.
No. 6: The washer does not respond to power on
The most frightening thing for the owner of the machine is the moment when the appliance stops responding to the power button. The washing machine does not turn on – a scary dream of the owner.
There can be several reasons:
- power supply burned out;
- the surge protector or socket is broken;
- the firmware is broken.
Everything that concerns electrics and electronics must be repaired with special care, and it is better not to undertake it at all, if you are not a professional. However, anyone with minimal knowledge of the basics of electrical engineering will be able to repair or replace a socket.
If the drum is not closed tightly, the protection is triggered and the washing will not start. If the latch is broken and does not close completely, the selected program cannot start the cycle.
No. 7: The drum does not rotate or rotates to one side
If the washing starts, but looking through the window on the door, you find that the drum is not moving, look for the cause of the washing machine malfunction, most often it is:
- The drive belt is torn;
- The motor is broken;
- A foreign body got between the drum and the tank;
- Program failure.
One of these causes can be detected without even disassembling the appliance. Unplug the appliance and try turning the drum by hand.
If a foreign object interferes with movement, it is enough to remove it. A more serious breakdown will require more time and money to buy a new part.
A guide for the home handyman
If you have decided to make do with your own knowledge, familiarize yourself with the procedure for repairing or replacing worn parts of the washing machine.
Having in front of you an approximate plan of what follows, it will be easier for you to understand the technique and not to make mistakes. However, please note that some variants of failure are better not to try to fix it with your own hands, even if they are very itchy. Sometimes it is better and cheaper to go to a repair service.
Most often with breakdowns of the washer we encounter already in the process of doing laundry. In this case, any repair work will have to start with the standard procedure – draining water from the tank.
An area of opportunity for the self-master
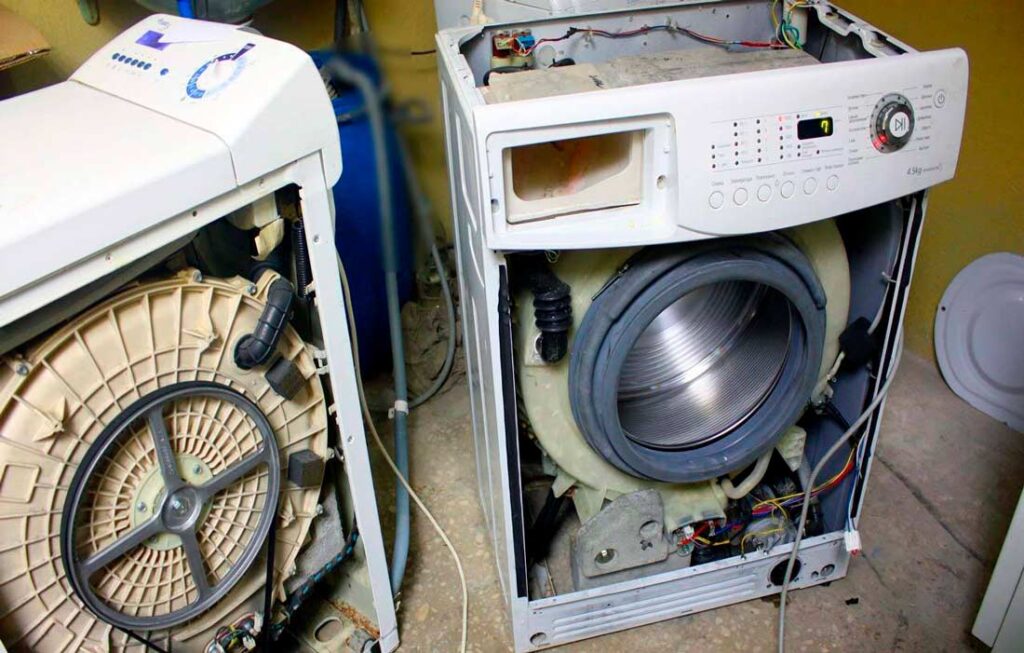
No matter how you like it, you risk adding more trouble to yourself while repairing the washing machines yourself. This household appliance has a complex structure and a large number of components and parts.
Taking up the repair with your own hands, you should be aware of the responsibility and not take on the work, not having experience and knowledge in this area.
As a rule, the repair with your own hands involves replacing the broken part with a new one, it can be a replacement:
- drive belt;
- pump;
- temperature sensor;
- filter;
- control board;
- heating element;
- cleaning of nozzles and filters.
These works do not involve disassembly and repair of complex assemblies, you can cope with them without having special tools.
If you have diagnosed the breakdown yourself and found that the washing machine requires replacement of shock absorbers, seals, locking mechanism, the door cuff, it is better to ask for help in repair to a professional.
Before you repair your washing machine, prepare this set of tools:
- screwdriver (flat and Phillips);
- flat wrench (8/10 and 19);
- pliers;
- long nose pliers;
- pliers.
In fact, this tool is in the drawer of most home repairmen.
To repair the control board, sensors and electronics in general, you may need a soldering iron and everything related to it. But if you don’t plan to repair the programmer, you don’t need to know how to solder.
Filter cleaning is an elementary operation
The easiest thing the owner of a washing machine can do with his own hands is to clean the filter. To do this, you need to open the small rectangular door at the bottom of the machine. If it is difficult to do this, you can pry the door with a screwdriver. Be careful not to scratch the paint.
In front of you you will see a rubber or plastic plug. It should be unscrewed. You can do this with your bare hands by turning the plug counterclockwise several times.
Then rinse the filter under running water. Look into the hole, there is often debris, leftover threads, wool, hair and other debris. All this should be removed with your hands. Light yourself up with a flashlight to see better. Put the filter back in place, screw it on, put the front panel back in place.
In addition to this filter, some washing machines are equipped with a particle catcher at the inlet. It cleans the water coming from the water supply from large particles of sand, dirt, rust. This filter can also get clogged and cause equipment failure. Therefore, it should be cleaned regularly.
It is located before the water intake valve. It has the form of a small plastic mesh. To clean the inlet filter, you should remove the inlet hose, remove the filter from the hole with pliers.
After flushing, everything is assembled in the reverse order and the washer is connected to the water supply. The higher the level of contamination of the water in the water supply in your area, the more often it is necessary to carry out preventive cleaning of the fill filter.
If when removing the filtering device you find that it is damaged, you will have to replace the filter. The procedure is extremely simple, but requires a competent selection of the part. With the technical and technological subtleties of the process will familiarize you with our recommended article.
Replace a worn or torn drive belt
If the drive belt of your washing machine is worn or torn at all, the repair with your own hands will not help, it remains only to replace the part. Using the full model name of your appliance, select the correct drive belt by marking.
The process of disassembling the washing machine and replacing the belt is as follows:
- Disconnect the washing machine from the power and water supply.
- Unscrew the bolts fixing the back wall.
- Just behind the back panel you will see the pulley and the protruding motor shaft, on which the belt should be tensioned.
- Remove the old drive belt by twisting the pulley with your other hand.
- Slide the new belt onto the motor shaft.
- Rotate the pulley and gradually put the belt over the pulley. Make sure that there is no twisting.
- Check the tension. The belt should be taut enough to bend when pressed.
After repairing the belt, make a few turns of the pulley to make sure everything is as it should be. Close the rear panel of the machine and try to run a test wash.
Water heater – replacement of the heating element on your own
If the washing machine repair involves the complete replacement of the heating element, you will have to do the following operations. Remove the back cover. Most often the heater in washing machines is located at the back, but there are other options.
If you do not know exactly on which side is the heating element in your model of machine, look at the manual or start with the back cover at random. The thing is, it’s much easier to remove than the front. So even if you make a mistake, screwing the panel back into place won’t be difficult.
Disconnect the terminals. After removing the cover, you will not see the heating element, but only its connection. It is necessary to disconnect the terminals and check the element for proper operation. A multimeter is helpful.
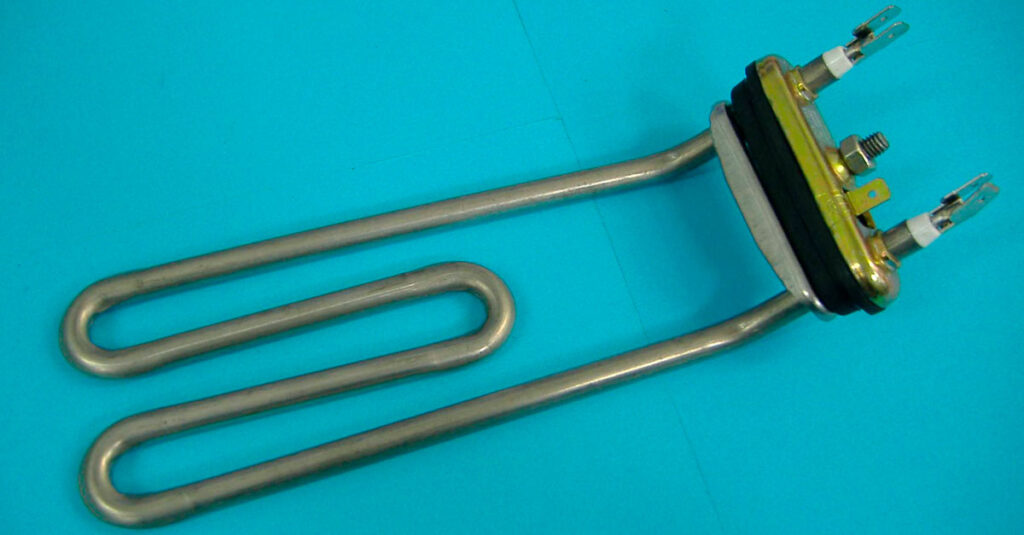
To remove the faulty heating element, unscrew the nut with a wrench. Then push on the pin, using a screwdriver is best.
To keep the heater steady, it is mounted with a rubber gasket. To disassemble, pry up the rubber and start pulling the part out, slowly “picking” it out of the seal with a screwdriver.
It is recommended that you remember, or better yet, take a picture of the location of the parts and the connection of the wires before disassembly. So you can easily assemble everything in its place after completing the repair with your own hands.
When the old heater is removed, you can proceed directly to the replacement. Take the new part and install it in place of the old one in the same position. Then screw the nut on the stud in reverse order. Make sure the gasket is not deformed or “bent”. The nut should be screwed tight, but not too tight, so as not to squeeze or distort the heating element.
To check if the repair is correct, run the wash without laundry in hot water mode. Put your hand to the door glass after 15-20 minutes of operation. If the glass is warm to the touch – the heating element is working. Click here for help with washer machine repair in Brooklyn.
Installation of new shock absorbers
If your washer became too noisy during spinning and vibrates, then the problem must be solved by installing new dampers (shock absorbers):
The above steps we have taken in order to remove the tank with the washing machine drum from the casing, as it is not possible to change the shock absorbers in such models without this step. Next we will deal exactly with the change, i.e. take out the drum, unscrew the worn out dampers and put new ones.
Washing machine pump replacement
In most popular models of washing machines, a broken pump can be easily repaired with your own hands. For someone who is not often faced with the repair of various kinds of equipment, it is hardly possible to fix a broken pump. Much easier and faster to replace it. To do this, you need to buy a part of your brand.
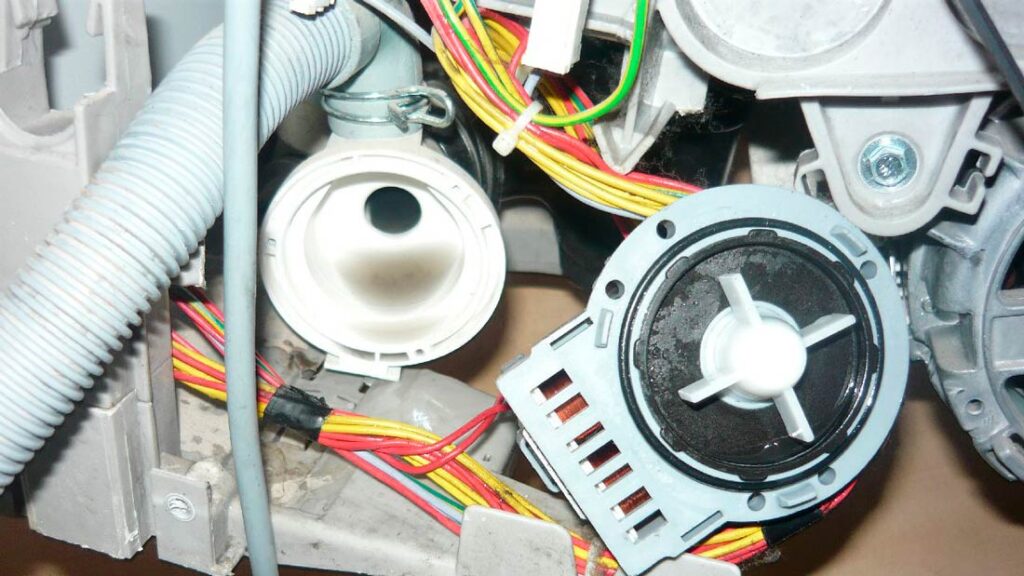
Before you repair a washing machine with a broken pump, you should turn it in such a way as to have unobstructed access to the bottom.
Remove the bottom panel. The bottom panel can be either snap-fastened or bolted in place. The pump itself is attached to the housing with screws. These must be unscrewed with a screwdriver.
Apply some force and push the drain valve from the outside, pushing the pump inside the housing. With your other hand, pull the pump outward. Disconnect the wires to the pump.
To install the new pump repeat all the steps in reverse order: connect the nozzle and the hose, connect the wires, install the equipment in place and fasten the screws to the housing. Then install the bottom of the washer and put it in a working position.